

Introduction
If you are just starting with your cloud journey creating and connecting to a Virtual Machine might seem like a daunting task, especially with all the options available on a cloud portal.
In this blog we will be mainly be focusing on creating a windows virtual machine on Microsoft Azure and connecting to it through RDP(Remote Desktop Protocol). RDP is a protocol developed by Microsoft which provides a user with a graphical interface to connect to another computer over a network connection
Getting an account on azure
Some of you might already be having an Azure account but if in case you don't there are primarily two ways through which you could get one.
Student - If you are a student then you are in luck. As you can use $100 that azure provides for trial. Just head over to this link and complete the signup process
Working Professional - There which working professionals can get 12 months of free services access to azure by entering Payment Details and activating recursive payments. Click here to get started.
Others - Other methods include activating azure benefits through already existing Visual Studio Subscription and Promo Voucher Codes
Steps for a basic Windows Virtual VM
Go to azure portal and click on create a resource
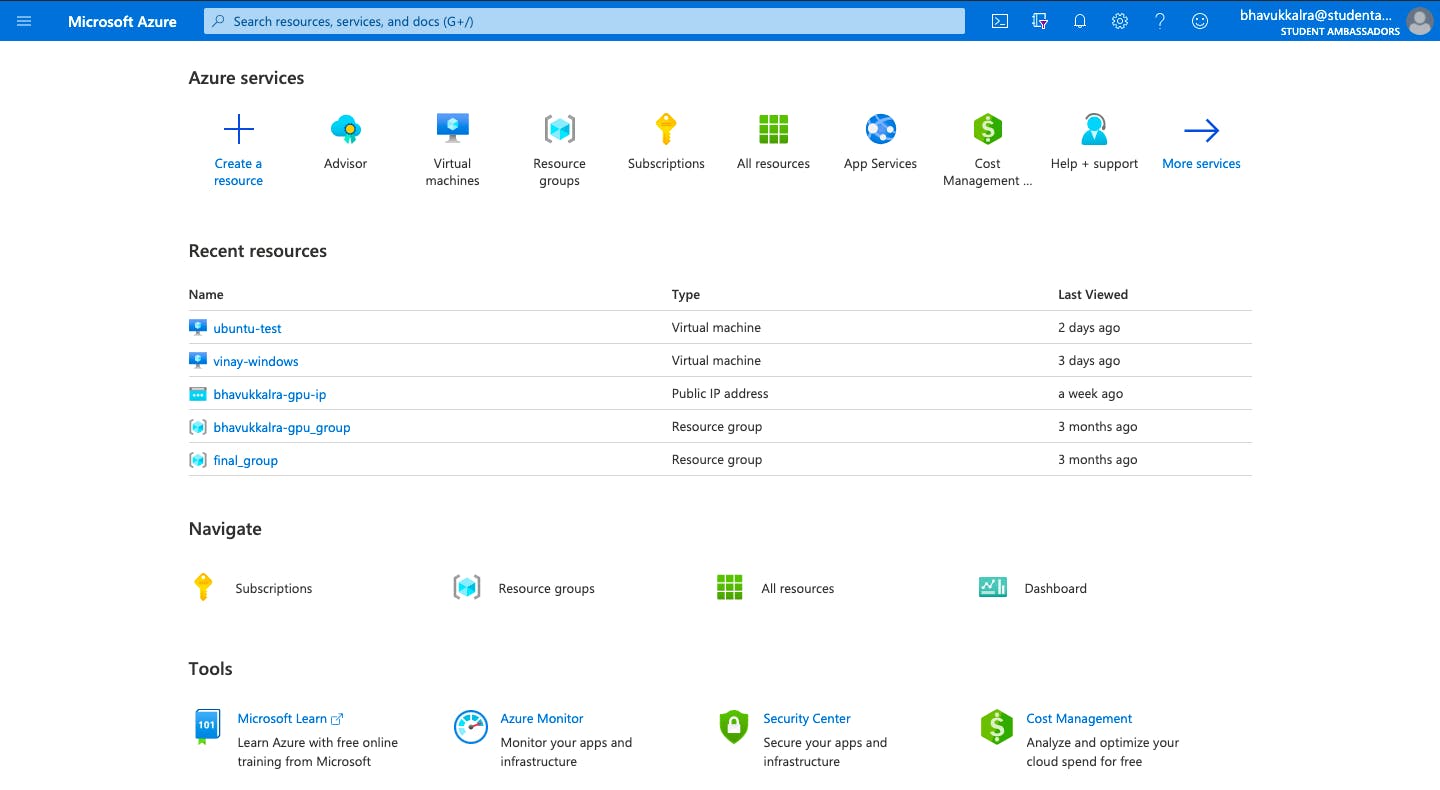
Click on compute type resource from the left pane and then select virtual machine

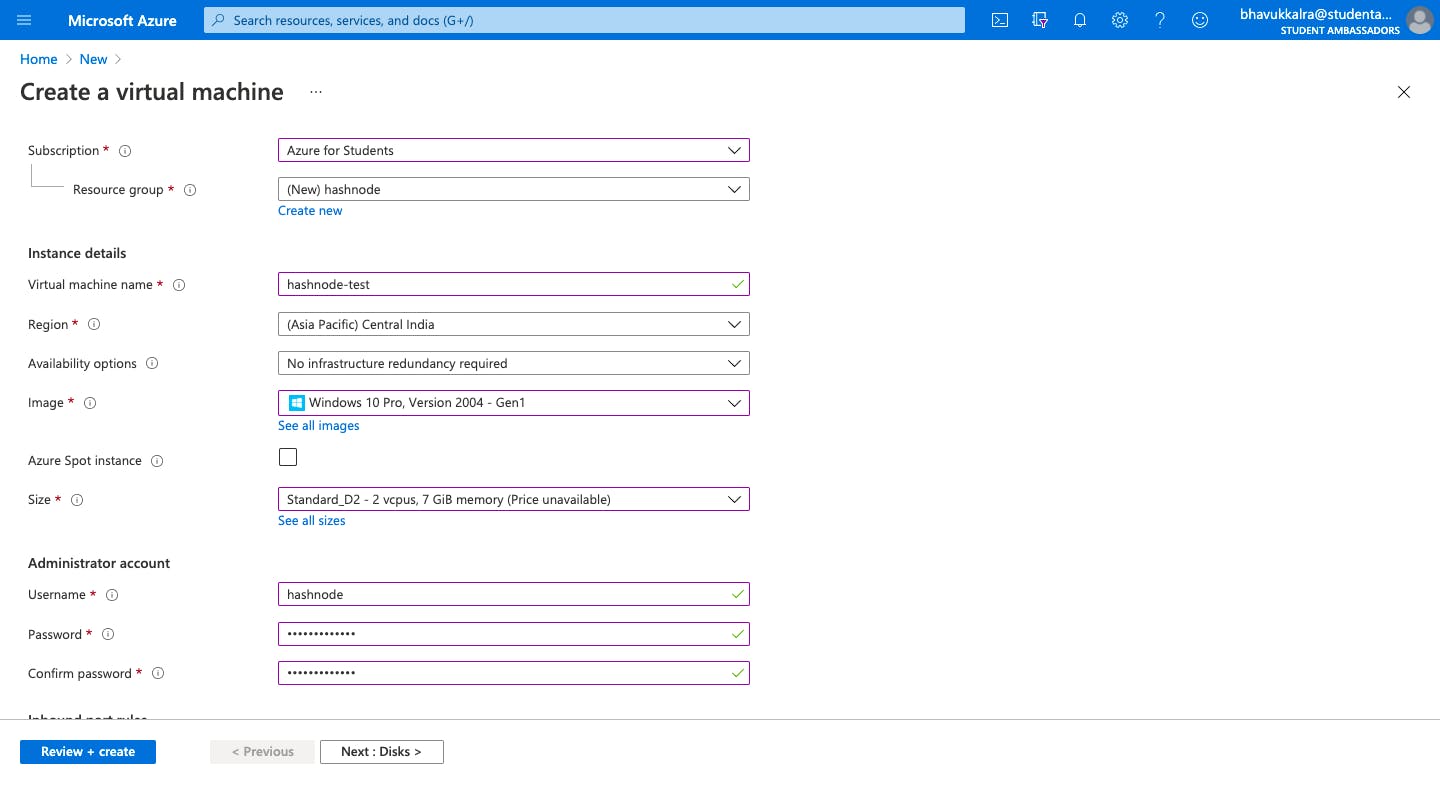
Enter the credentials like Resource group, Virtual machine name, username and password(Authentication). But there are a few options that require some attention for instance Region - The VM that you may need might not be available in the region closest to you. So, Just select another region in which it is available. But keep a note on pricing for that region as each region has a different one. Try and explore different regions and VM's to see which combination best fits your needs. To maintain the simplicity of this blog we are going with a Standard type VM.
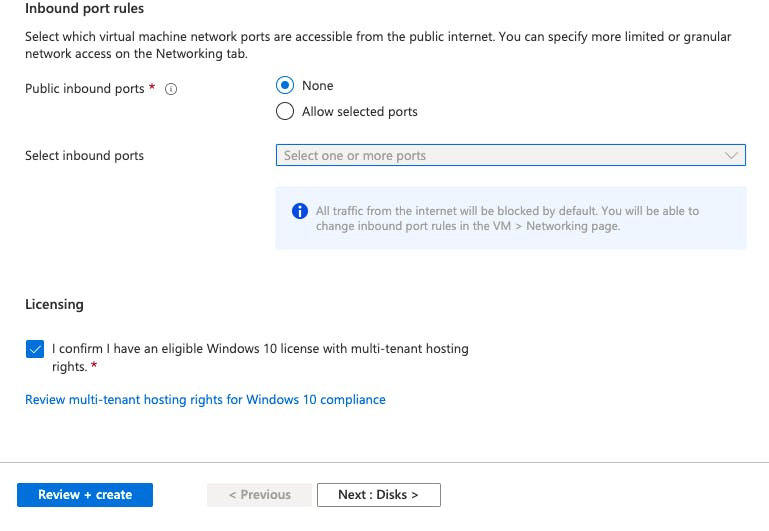
By default, access to the virtual machine is restricted to sources in the same virtual network, and traffic. So, to restrict only authorised IP address and ports to connect to your VM select public inbound port rules to none. Public is recommended only for testing purposes only.
Click Review + Create after reviewing all the configurations. Click Create. The Deployment process will start and might take around 3 minutes. So, grab some snacks sit back and relax🍕
Click on Networking from the left pane and click on Add inbound port rule
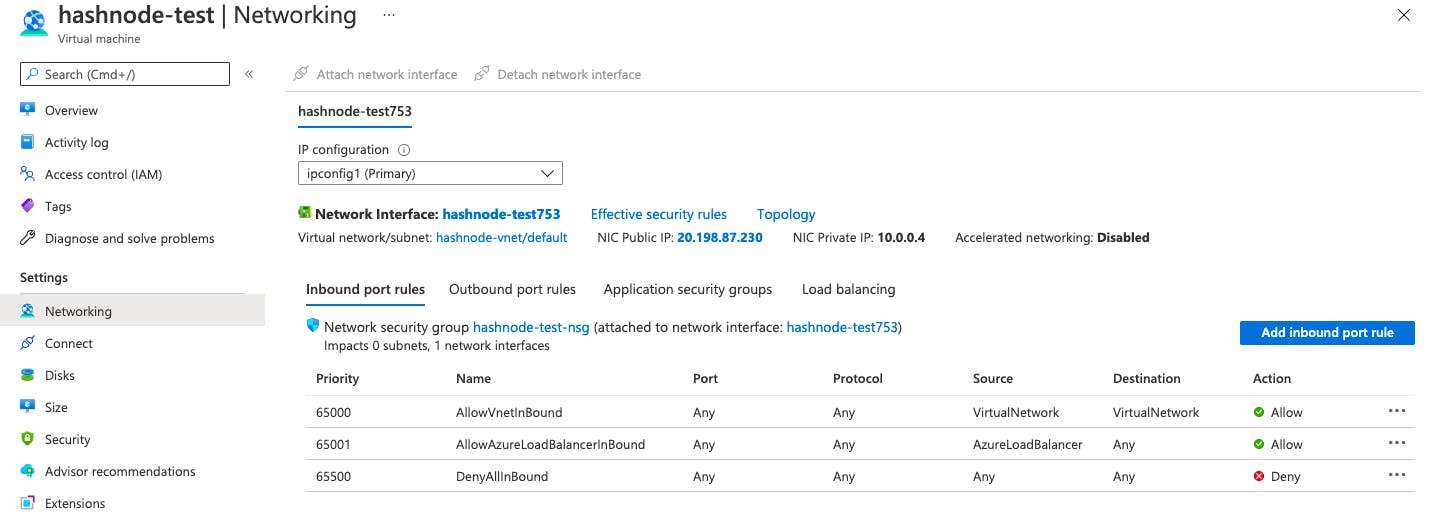
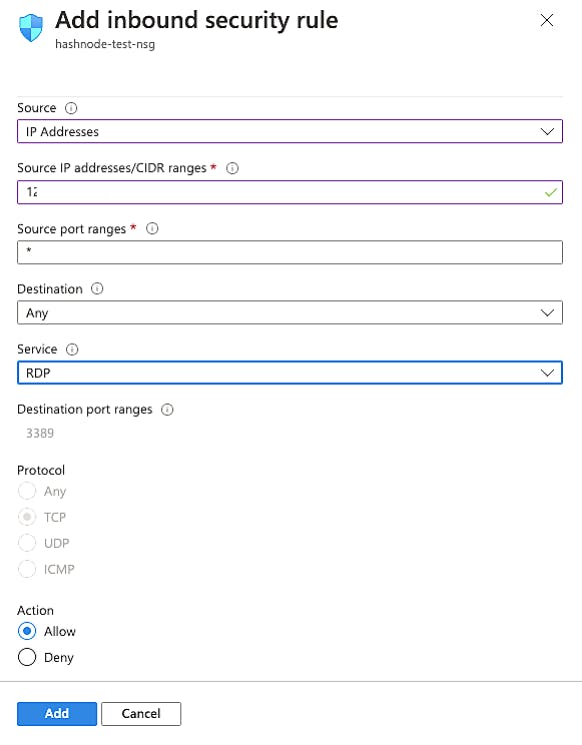
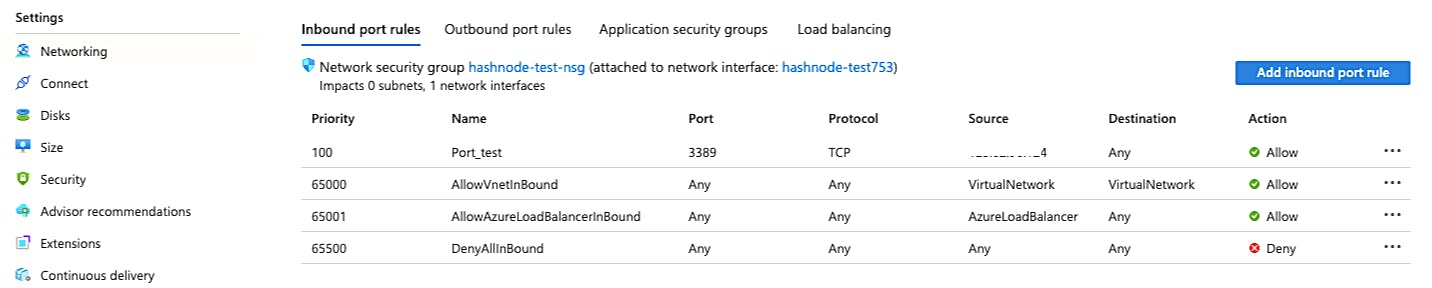
Add an inbound port rule to allow RDP connections through your public IP address
Click on Overview tab on the left pane. Click on Connect and select RDP as a connection mode. Download the RDP file

For Windows users, just simply double click the RDP file. Enter the username and password set by you while creating the VM. MAC users, as it doesn't comes in built with a Remote Desktop Client, You can download Microsoft Remote Desktop for the same and import the RDP file in it.Linux/Debian based systems can make use of Remmina for a RDP connection

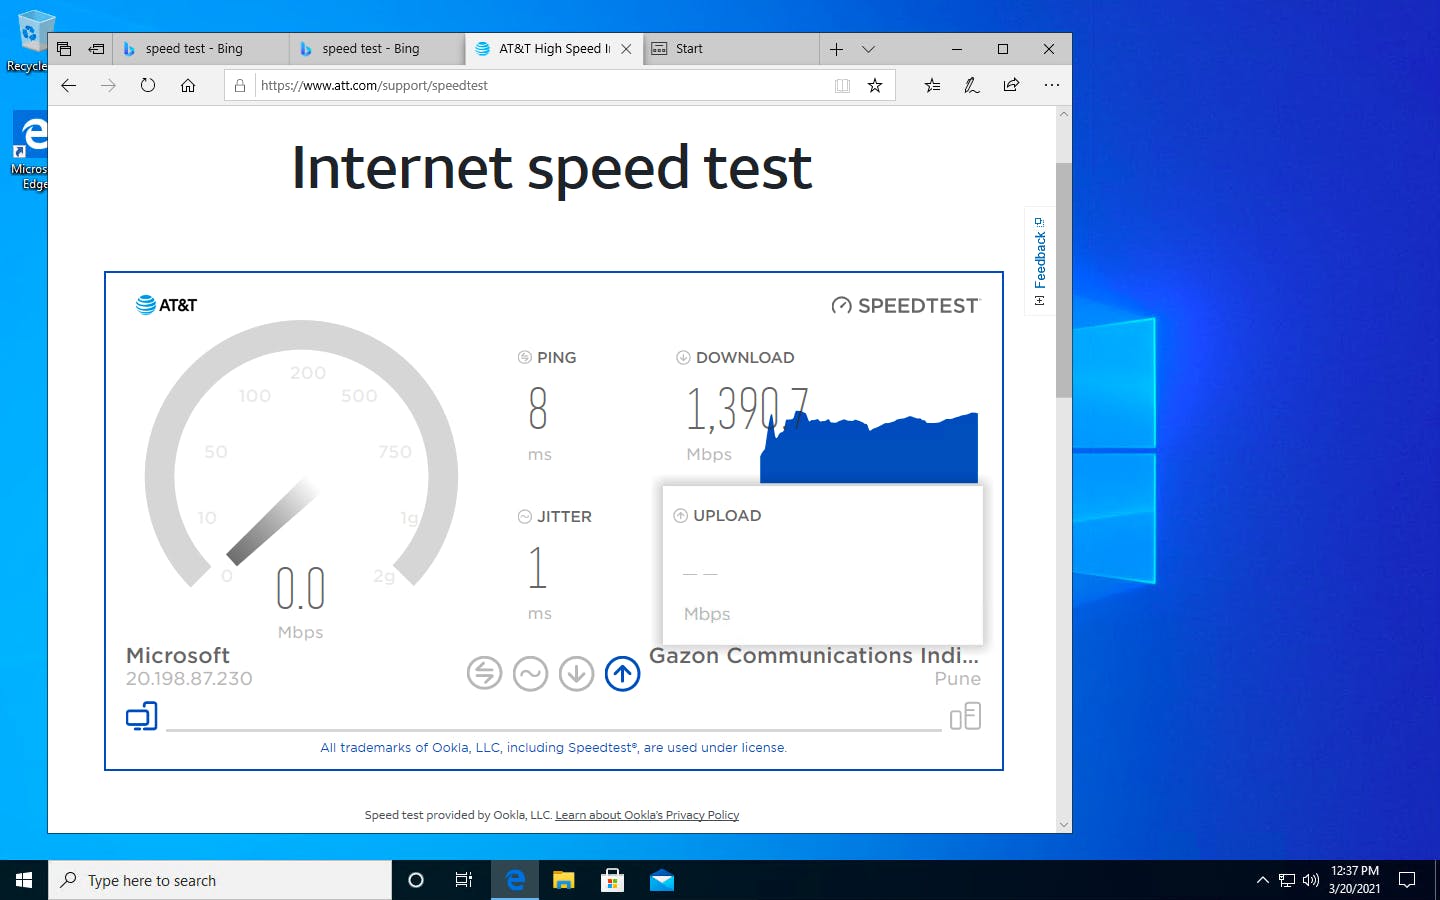
Voila 🎉 and We are in. Run a fun speed test to experience the internet speed at the Azure servers🔥
Conclusion
In this Tutorial we discussed upon how to create a standard VM on azure and connect to via RDP. There are still a lot more options that you can explore on azure for instance - See what different types of VM's are available, What are Scale Sets, Availability Zones, Infrastructure Dependency to get yourself more familiar with the platform.
But if you want azure for server side operations like Continuous Integration and Development(DevOps CI/CD) then Ubuntu/Linux might be a better option. By default Linux VM's don't come with a RDP(Graphical Interface Remote Desktop). So, if you try the approach that we just discussed in this article then it will not work, but there are ways around it as well(Coming up in the future😁). So, if we can't directly control a linux virtual machine via Graphical Interface, then how do we control it at all? The answer is SSH(Secure Shell). SSH connects your terminal with the terminal of the VM in the cloud.
In the next blog we will take a look at exactly the same i.e we will be deploying and connecting to a Linux VM on the cloud via SSH.
Thanks For Reading. Hope you have a nice day😋